Why C#?
Scalability
Start with
Project Solution
Start a solution / project
- Create a
new project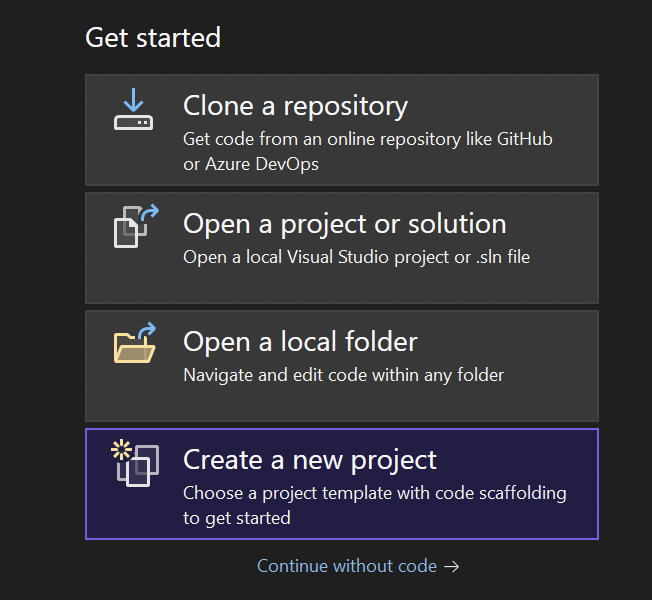
- Choose the Revit Addin (
Nice3Point) Template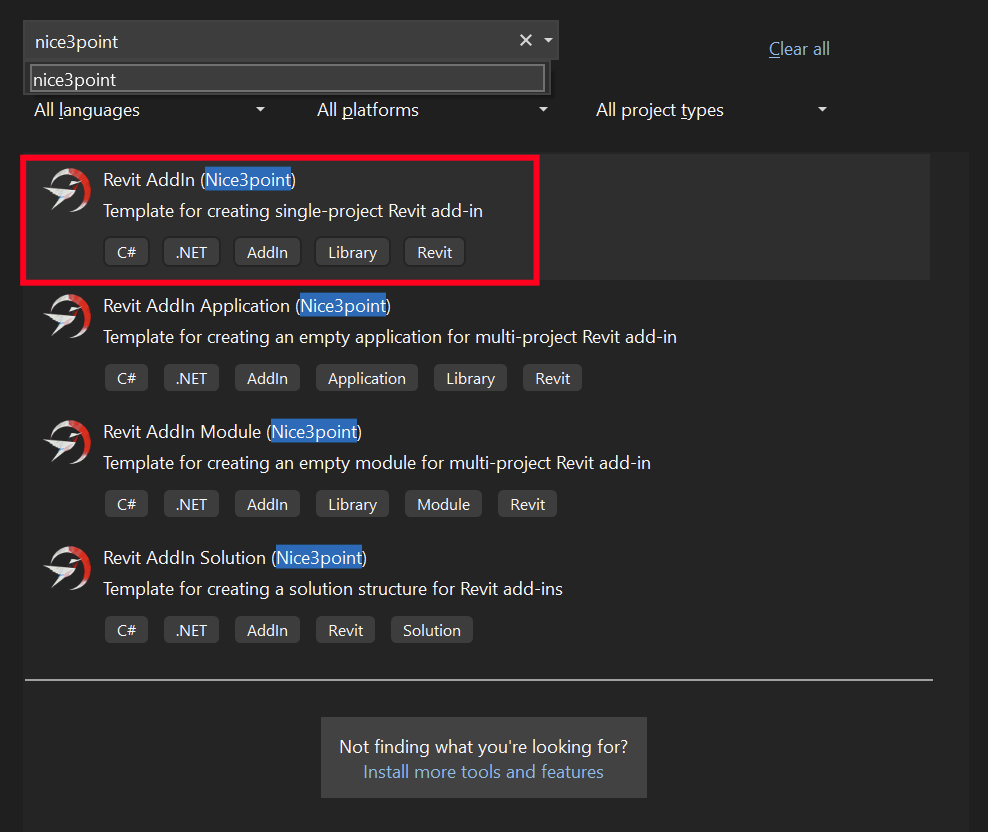
- Configure your new project
Nameof the projectLocationSolution Name- same as project name (it’s a folder name that holds many projects)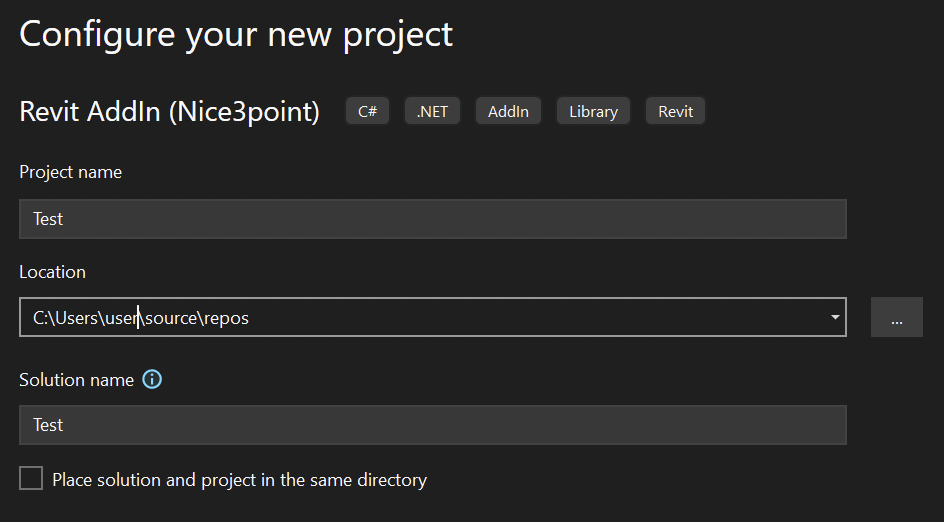
- Additional Information
- Add-in type ->
Application - User Interface ->
None - IoC ->
Disabled - Serilog support ->
unchecked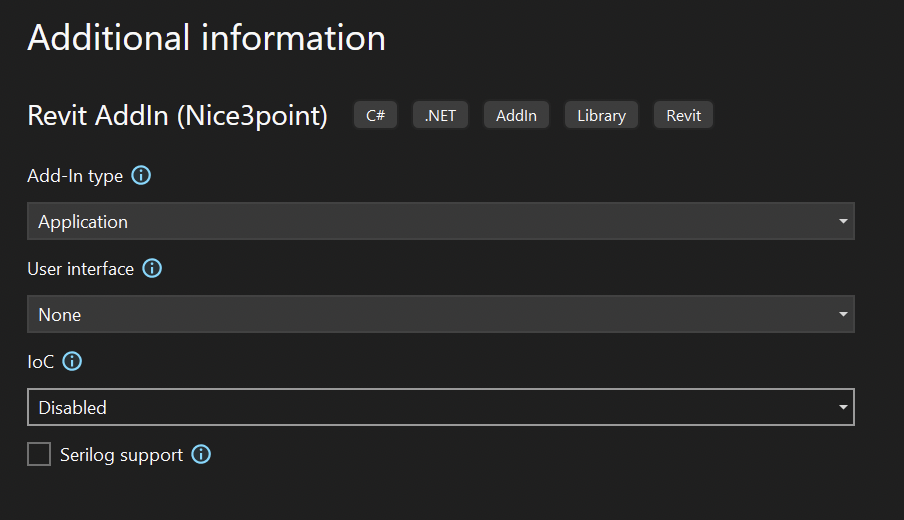
- Add-in type ->
Keep it simple for now, you can change those settings later in the project.
Exploring Your Visual Studio Project
Solution Explorer(Like Revit’s Project Browser)- This is where you see all your project’s files, folders, and references. Think of it like Revit’s Project Browser but for your code.
- Error List & Output Window
- Error List shows mistakes or warnings in your code.
- Output Window shows messages from Visual Studio, like when a build succeeds or fails.
- The .csproj File
- This file stores all your project settings. With the Nice3Point template, it’s already set up for Revit 2025, so you don’t need to configure much yet.
- The .addin File
- This file tells Revit about your plugin—where it is and how to load it.
- For now, just change the GUID (a unique ID for your add-in).
- We’ll adjust other settings later.
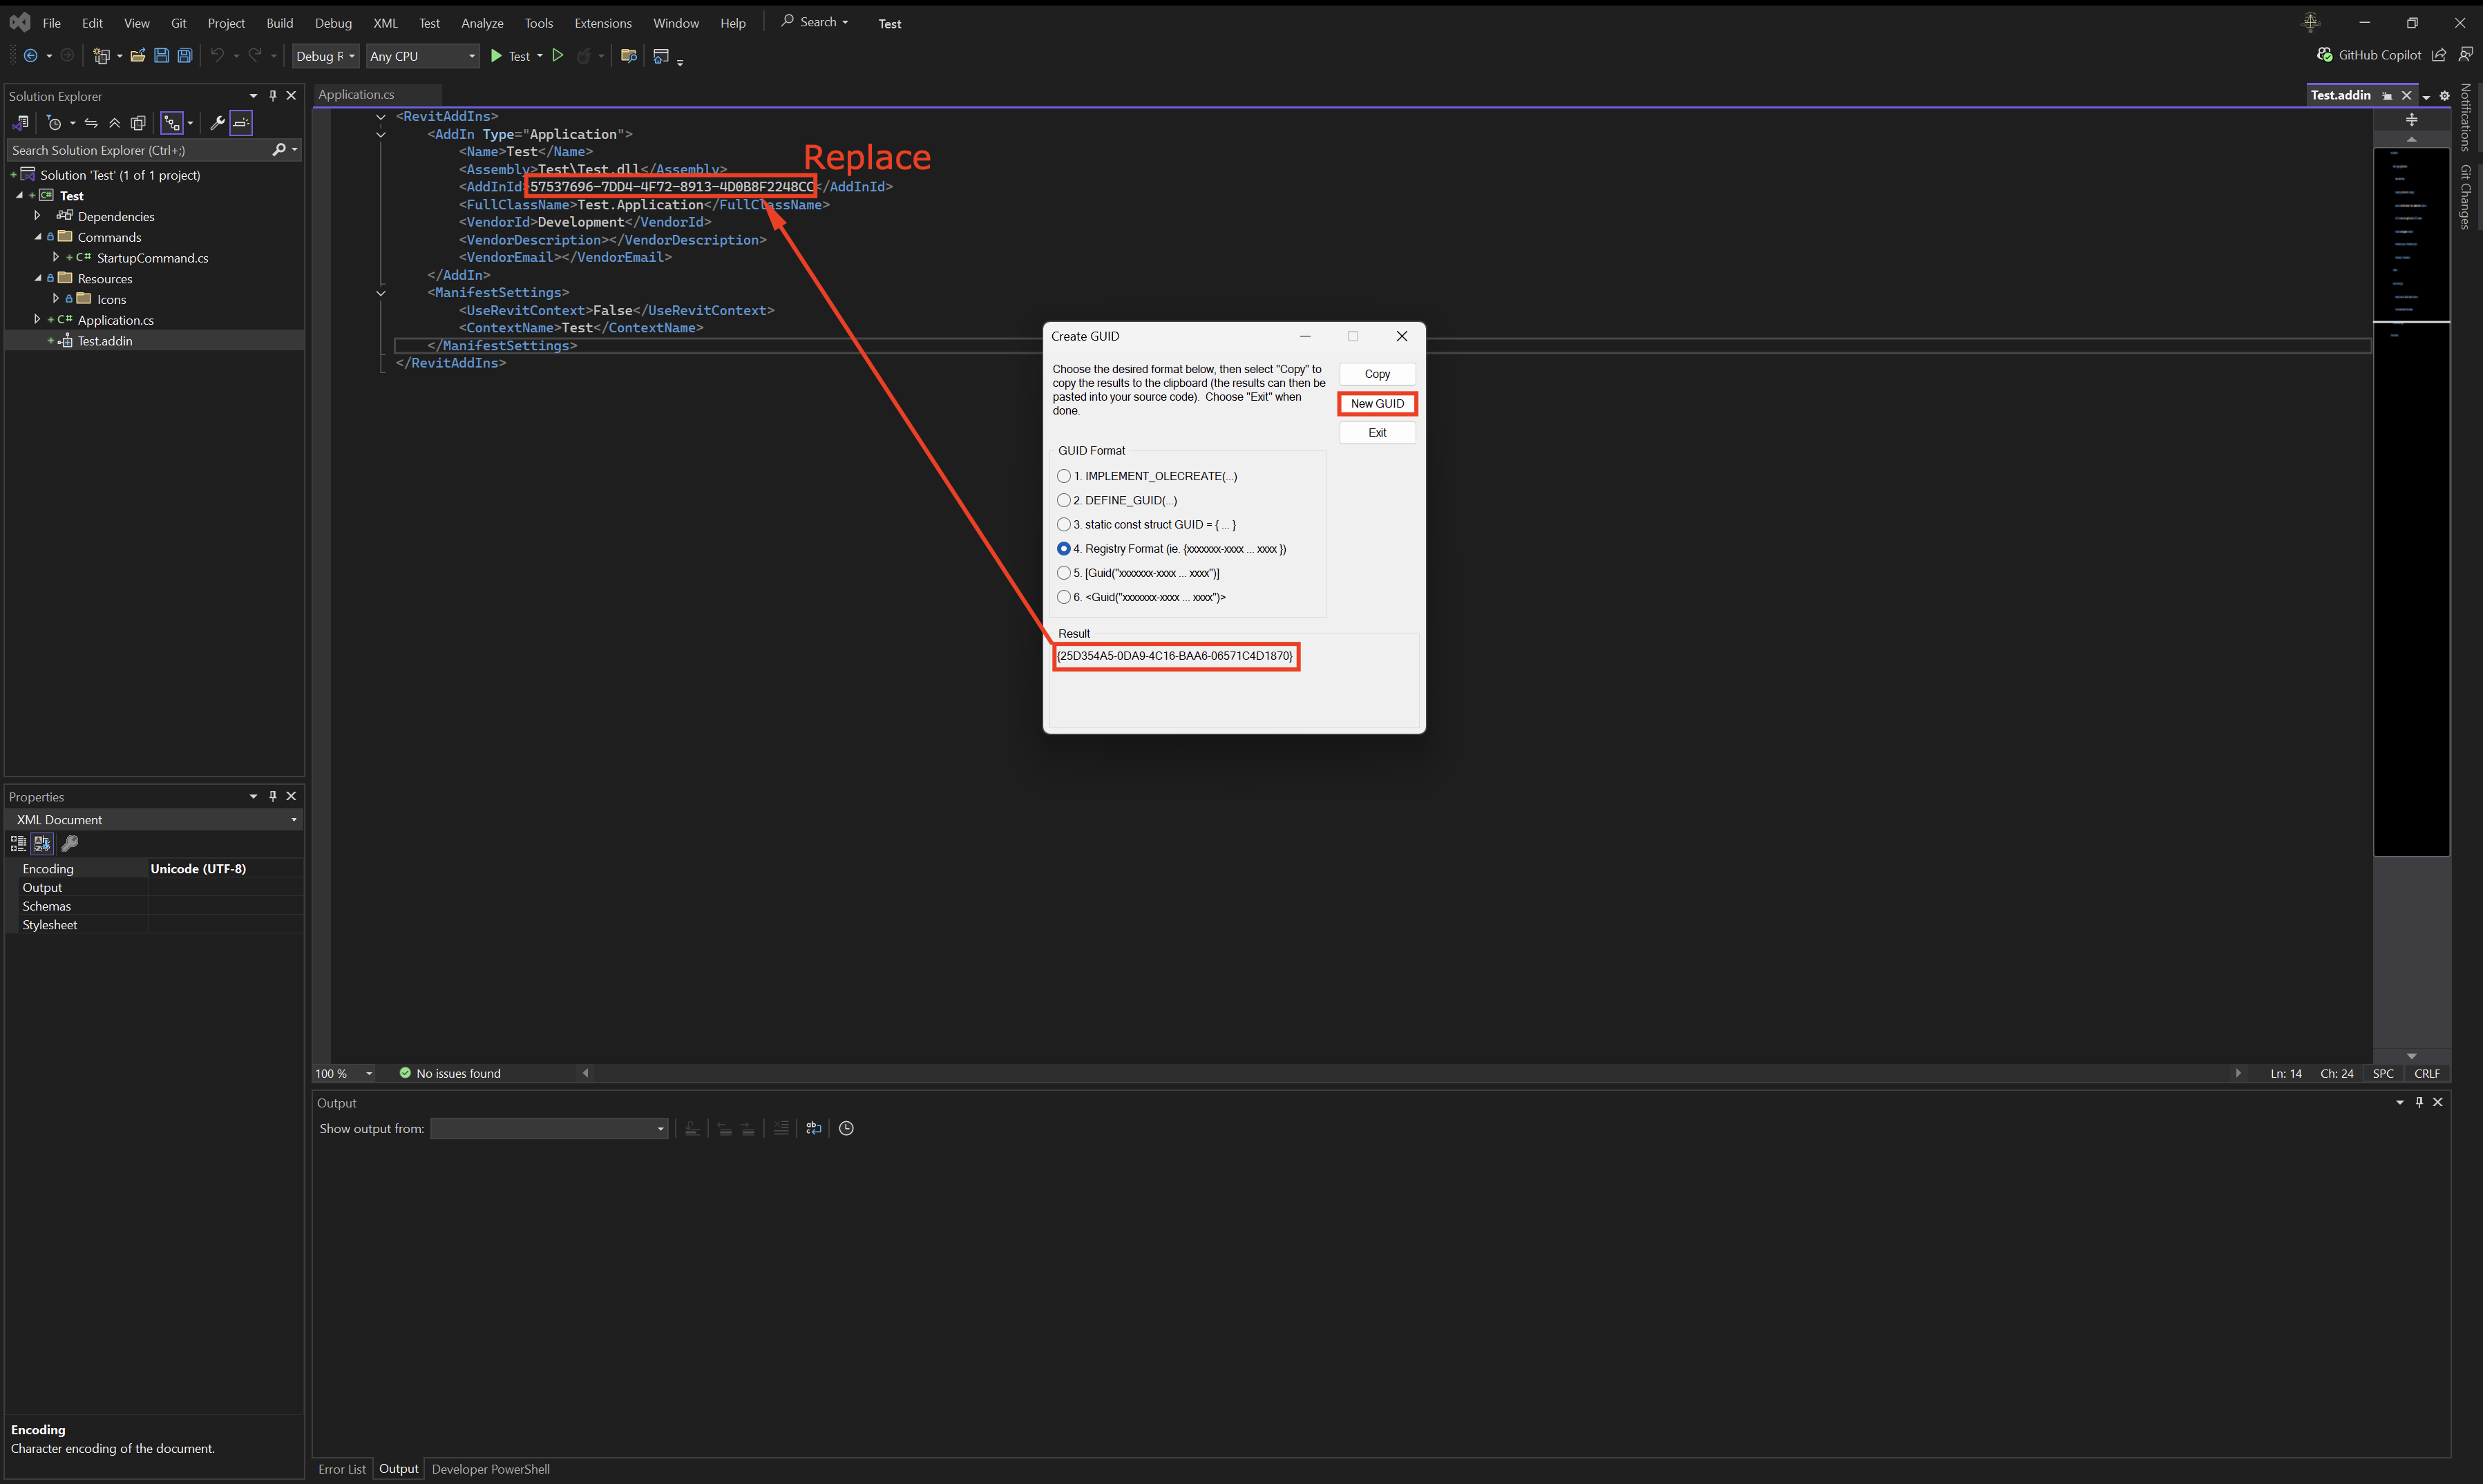
- This file tells Revit about your plugin—where it is and how to load it.
The Application Class
This is the “entry point” of your plugin. Revit looks here first when starting or closing:
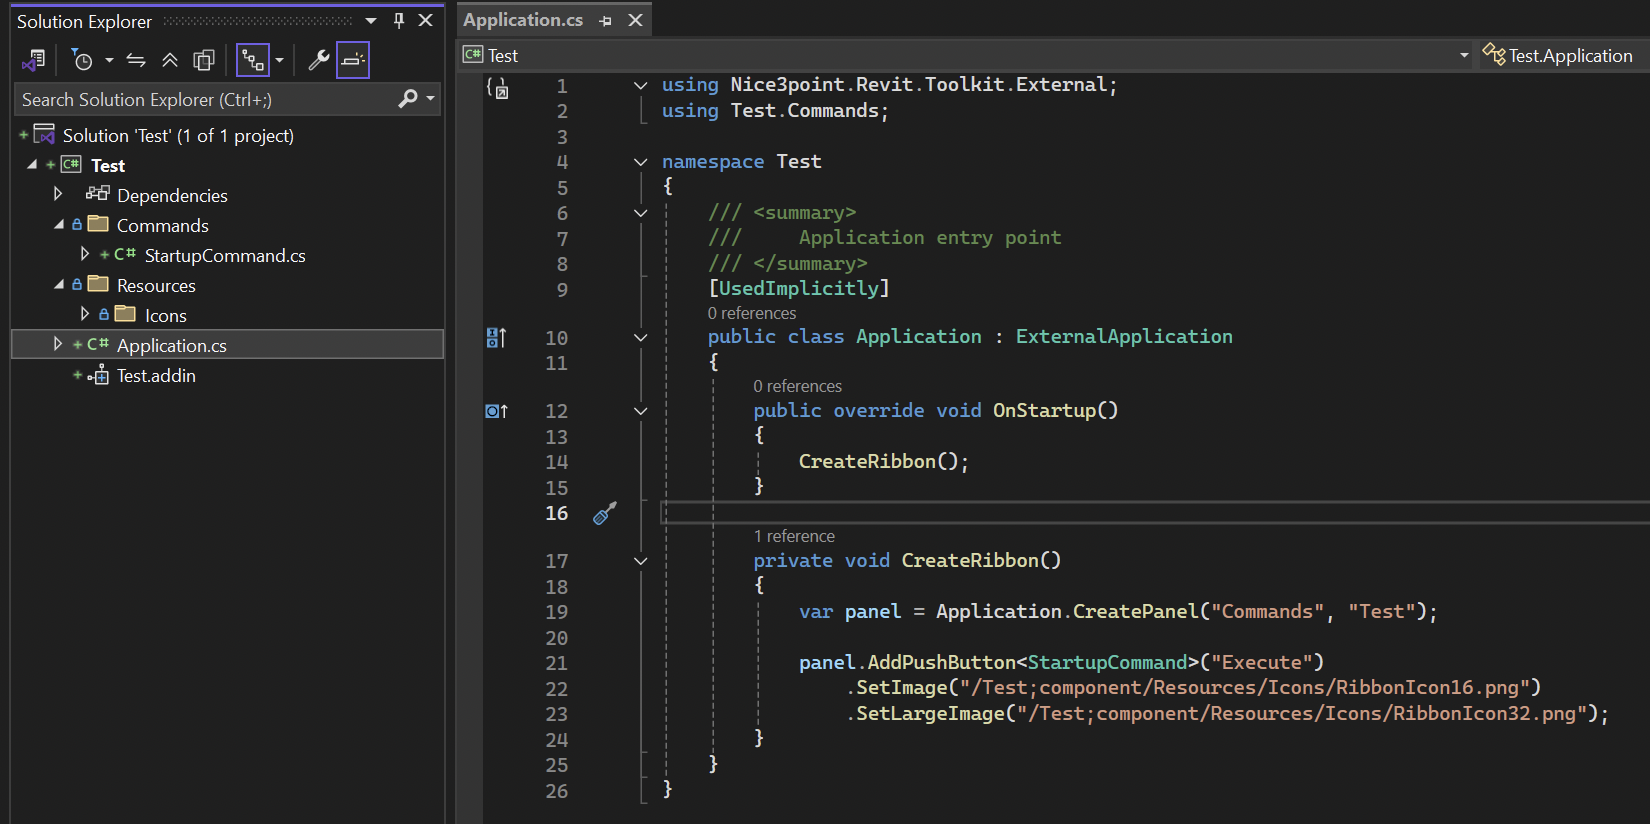
- Class Type:
ExternalApplication- This tells Revit that your add-in is an application (not just a single button command).
- The
OnStartup()Method- This method runs automatically when Revit starts.
- It calls another function named CreateRibbon().
- CreateRibbon() sets up a Panel in the Revit ribbon.
- It adds a Button to that panel.
- The button includes two Icons for different sizes.
- This method runs automatically when Revit starts.
- How
CreateRibbon()Works- CreatePanel() is a built-in Revit API function that creates a panel.
- AddPushButton() is another API function that adds a clickable button.
- Both functions come preconfigured in the template, so you can start coding without needing to set them up yourself.
Commands FolderStartupCommand.cs- Core Code
 1
 2
 3
 4
 5
 6
 7
 8
 9
10
11
12
13
14
15
16
17
18
19
using Autodesk.Revit.Attributes; using Autodesk.Revit.UI; using Nice3point.Revit.Toolkit.External; namespace Test.Commands { /// <summary> /// External command entry point /// </summary> [UsedImplicitly] [Transaction(TransactionMode.Manual)] public class StartupCommand : ExternalCommand { public override void Execute() { TaskDialog.Show(Document.Title, "Test"); } } }- Currently: Task Dialog - Shows the name of the
.addinExternalCommand, but we should useIExternalCommand
- This is the part that writes the logic for your button
- Once you click the button, whatever is under Commands Folder connected to the button will be executed.
- If you change the TaskDialog.Show(Document.Title, “Hello World”);
- Once you press the button in Revit it would show “Hello World”
- Resources:
- Icons
- Everything is saved in windows explorer
- Configurations:
- Debug and Release
- Per Revit Version from R20 to R25
- References:
- Under: This PC > Windows (C:) > Program Files > Autodesk > Revit [2025].
- DLL Files that you can reference to your project to build something.
- You could even add an excel package to work with Excel, will do that later.
- Build and test the first plugin
- Choose the
Debug R25for Revit 2025: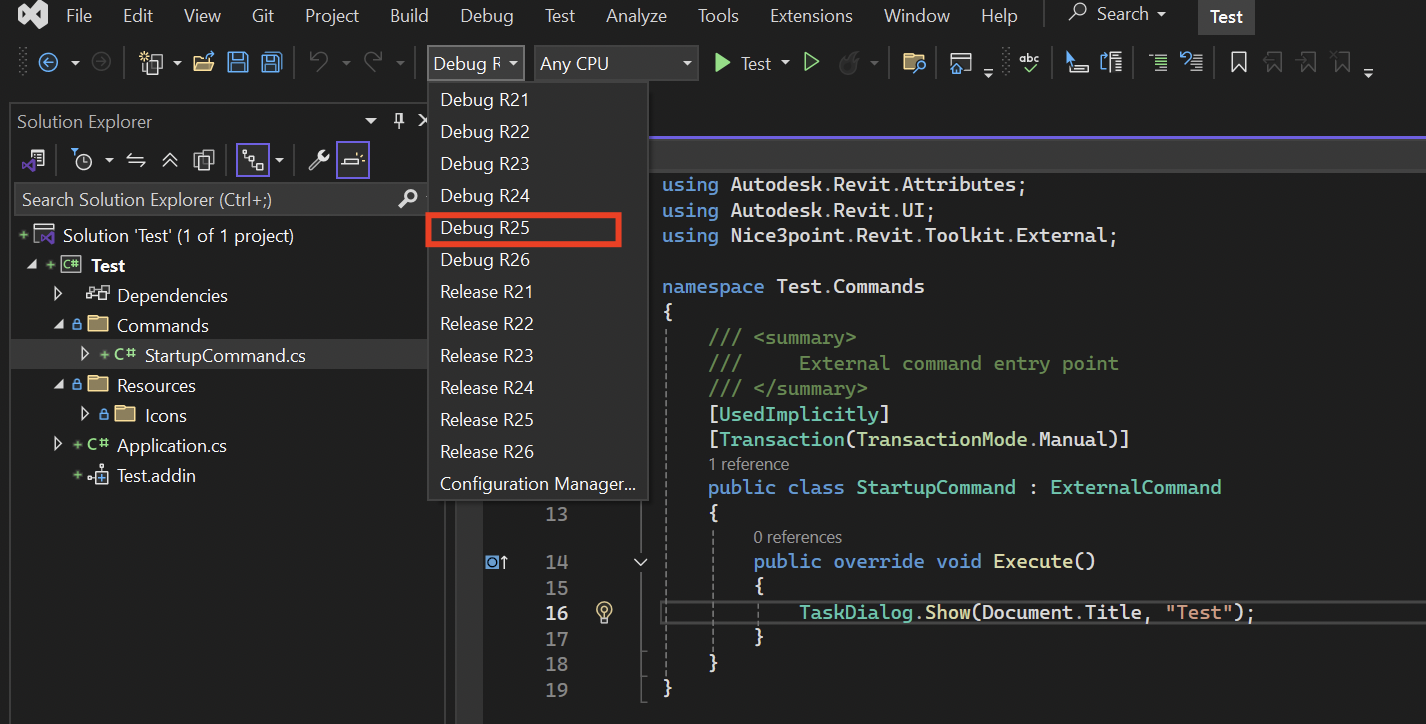
- Choose the
- Build the solution by clicking on
Run(Play ButtonTEST) next toAny CPU. - Launches Revit (Version that you pre-configured)
Always Loadyour.addin- What happened behind the scenes:
- VS2022 Added the DLL file and the
.addinfile into the right folder and launched Revit version that you specified with the Plugin loaded into Revit. - That became possible due to preconfigured Visual Studio
Nice3PointTemplate that you ran earlier. - Everything is already set and pathed for you for the ease of starting and launching plugins.
- VS2022 Added the DLL file and the
- Go to
New Project- Find your new panel in the
paneltabs on the top of Revit UI. - Find your Plugin / add-in
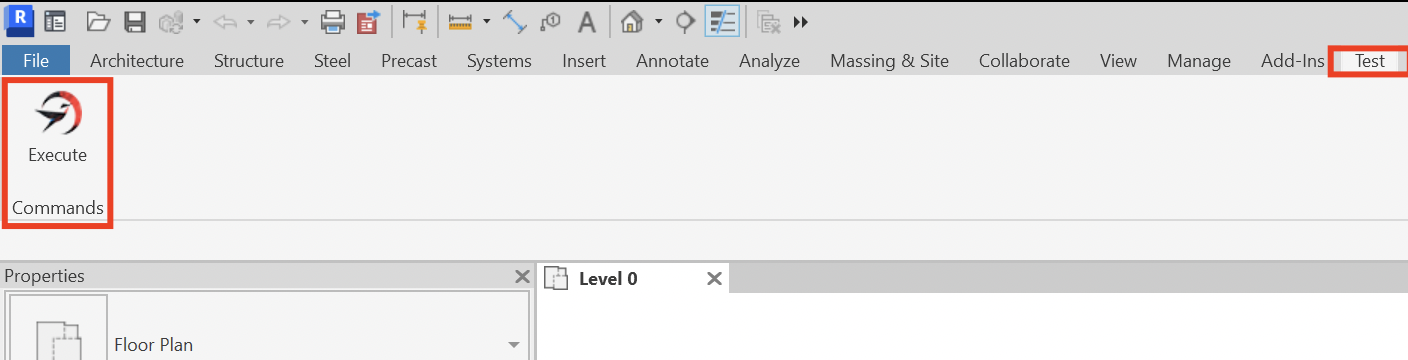
- Click on it
- And you will get a message with the
nameof your Tool.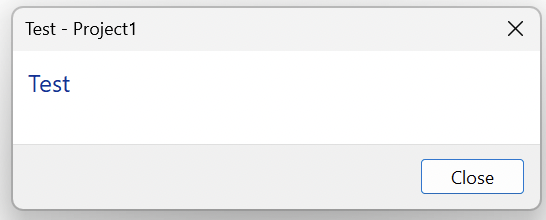
- Find your new panel in the
- That’s it, you can stop
Debugback in theVisual Studio- Closes Revit & Debug Mode
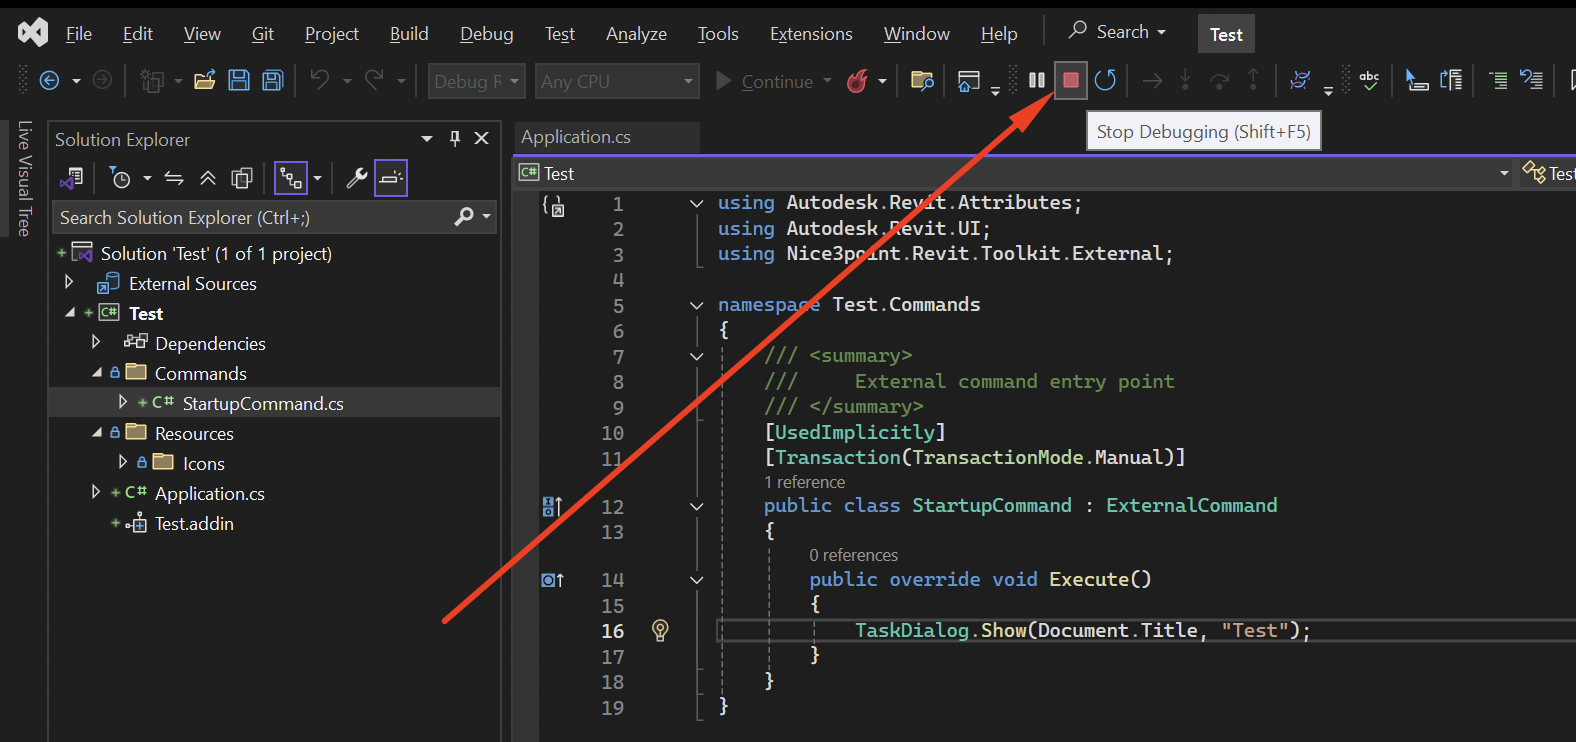
- Closes Revit & Debug Mode
From here, you have created your first application or button in Revit! Congratulations! Now, you’re ready to start coding real functionality. In Lesson 1, we’ll walk through a full IExternalCommand example step-by-step.