This lesson delivers on the promise from Lesson 0 — we’ll build a real command that:
- Tries to create a sheet (with proper error handling)
- Counts existing sheets in the document
- Shows a friendly summary to the user
✅ Prereqs: Finish Lesson 0’s
Applicationsetup first. If your project has no title blocks loaded, the command will tell you and exit safely.
Application vs. Command
- Application (starts with Revit): sets up your add‑in — e.g., creates ribbon panels and buttons. Think “wiring & menu.”
- Command (runs when you click a button): does the actual work — reads/modifies the model. Think “tool action.”
In code, these map to different interfaces:
| Interface | When it runs | What it’s for | Typical examples |
|---|---|---|---|
IExternalApplication | On Revit startup/shutdown | Add ribbon, register events | Add a panel & button |
IExternalCommand | When user clicks a button | Do work (read/modify model) | Create sheets, place views |
IExternalDBApplication | On startup/shutdown (no UI) | Listen to DB events | Batch/monitoring, analytics |
IExternalCommandAvailability | Before command enables | Enable/disable buttons based on state | Disable when no doc |
IExternalEventHandler | On demand from modeless UI | Safely touch model from background/UI threads | Progress windows, async tasks |
🧰 Using
Nice3point.Revit.Toolkit, it offers convenience base classes likeExternalApplicationandExternalCommandthat wrap these patterns. In this lesson we’ll use the rawIExternalCommandto learn fundamentals, while still showing how to hook it to a Nice3point ribbon.
Why does Revit require IExternal* vs External* classes?
Short answer: Revit is a host application. It will only call classes that implement its well‑known interfaces. The official entry points are IExternalApplication (app startup/shutdown) and IExternalCommand (user‑invoked tools).
Where do ExternalApplication / ExternalCommand (no I) come from?
Those are convenience base classes from libraries like Nice3point. They already implement the official interfaces for you and expose friendlier properties (e.g., Document, UiDocument), so your code is shorter. Under the hood, Revit still “sees” the interface through the base class.
Do I ever put both on the same class?
Usually no. Keep them separate because their lifecycles differ:
IExternalApplication(orExternalApplication) runs once per Revit session — ideal for creating ribbon UI, registering events, etc.IExternalCommand(orExternalCommand) runs each time the user clicks your button — ideal for doing the work (transactions, edits).
You can technically have a single assembly that contains two classes:
| |
That’s the normal pattern.
How Revit finds your code (.addin mapping)
Revit looks for an .addin file that points to your assembly and the entry class. Two common setups:
A) Recommended: Application loader + ribbon (one .addin entry)
- Add one
<AddIn Type="Application">entry that points to yourApplicationclass. - In
OnStartup, you create a ribbon panel and add a push button that targets your command class.
| |
Your
Application.OnStartup()then registers a push button like:new PushButtonData("CreateSheet", "Create Sheet", assemblyPath, "Test.Commands.CreateSheetCommand");
B) Command‑only (shows under Add‑Ins → External Tools)
- Add a
<AddIn Type="Command">entry pointing directly to a command class. No ribbon setup.
| |
When to use which
| You need… | Use |
|---|---|
| A button on a custom ribbon, app‑wide startup logic | IExternalApplication (or ExternalApplication) to create UI and wire buttons to commands |
| A user action that edits/reads the model on click | IExternalCommand (or ExternalCommand) with transactions |
| DB‑level event listeners with no UI | IExternalDBApplication |
| Enable/disable a command based on context | IExternalCommandAvailability |
| Safely modify the model from modeless UI/async | IExternalEventHandler |
TL;DR: The IExternal* interfaces are the contract Revit calls. Libraries provide External* base classes to make your life easier, but they still satisfy the same contract. Keep Application (startup & UI) and Command (do the work) in separate classes and wire them via the ribbon or a .addin entry.
Homework
A single command called CreateSheetCommand that:
- Get the active
Documentfrom the Revit context. - Start a
Transactionnamed “Create Sheet”. - Find a Title Block type (not instance!) and use it to create a new
ViewSheet. Committhe transaction on success.Collectall sheets in the model and build a short summary:- Total number of sheets
- Up to the first 5 sheets as
SheetNumber-Name
- Display the summary with a Revit-native dialog (
TaskDialog). - Return
Result.Succeededif the command completes, otherwise use a rollback + error message as appropriate.
Solution
Show/Hide Code
Project Solution
| |
StartupCommand.cs (the command)
| |
Application.cs (the ribbon wiring)
| |
If you aren’t using Nice3point, you’ll add the button via plain Revit API in your
IExternalApplication.OnStartupimplementation and map the button toCreateSheetCommandin your.addinfile. We’ll cover a plain‑API ribbon in one of the later lessons.
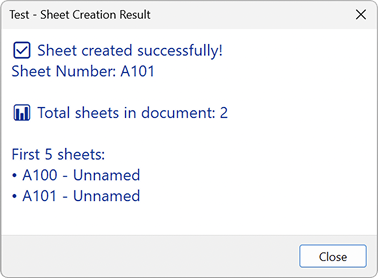
Result
Walkthrough (beginner‑friendly)
1) The required attribute
| |
Why Manual? You choose when to Start(), Commit(), or RollBack() a change to the model. That’s the normal mode for anything that modifies the model.
Other options you’ll see:
ReadOnly— safe for analysis/reporting (no model edits allowed)Automatic— legacy; not recommended
2) The command contract
| |
- Revit calls
Executewhen the user clicks your button. - You return a
Result:Succeeded,Cancelled, orFailed. - The three parameters give you context; most commonly you’ll use:
commandData.Application.ActiveUIDocument.Document→ the activeDocument(your model)
3) Transactions (the safety net)
Everything that changes the model must be wrapped in a Transaction:
| |
4) Finding elements efficiently
FilteredElementCollector is your workhorse for querying the model:
| |
5) Creating a sheet
| |
If there’s no title block type, Revit can’t create a sheet — hence the InvalidOperationException catch above.
6) Talking to the user
Use TaskDialog for in‑Revit messages. It supports titles, main text, and buttons, and it looks native.
Interfaces — clear differences at a glance
| |
“I vs. Nice3point base class”
Two equivalent ways to write a command:
Raw interface (this lesson)
| |
Nice3point convenience
| |
Use whichever your team prefers. Understanding the raw interface helps you debug anything.
Troubleshooting
- “No title blocks found” → Insert → Load Family → add a title block (
.rfa). Try again. - Button doesn’t appear → Check your
.addinmapping and the fully‑qualified class name. If using Nice3point, ensure yourExternalApplicationruns on startup. - Transaction errors → Make sure you call
Start()before modifying the model, and eitherCommit()orRollBack()for every started transaction. - Null
ActiveUIDocument→ There is no open project/document. Open a model first.
What’s next
- Lesson 2: A quick pit stop on fundamentals (bits, bytes, number systems in C#) to level‑set.
- Then: placing views on sheets, element filters in depth, selection APIs, and building small modeless tools with
IExternalEventHandler.
Shout‑out to Aussie BIM Guru for great Revit API inspiration.